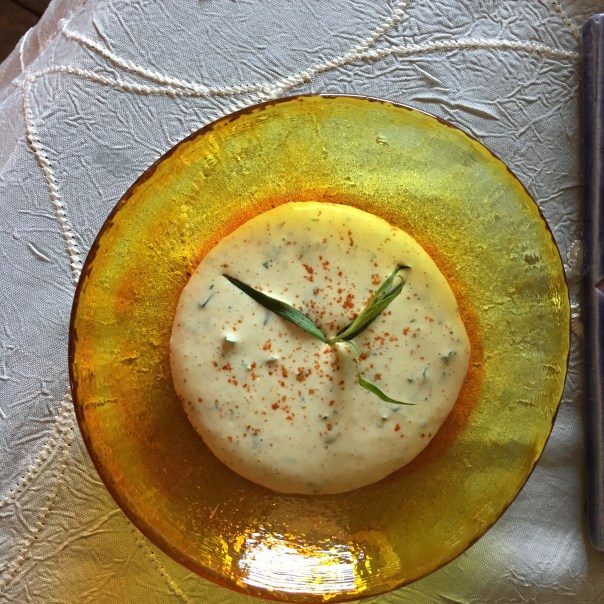
Finished Salmon croquette on a dish made by Paul Barchilon
I made this recipe for the first time last year in Boulder and learned it from Jessica Hersh at Bonai Shalom. So, really this is her recipe:
1 lb fresh salmon
1/2 lb smoked salmon (any kind)
several green onions, cleaned
neutral oil for frying (like sunflower)
Process the fishes and the green onions in the food processor until you have a thick paste. Form into balls or ovals and cook in a hot saute pan with a very small amount of oil (just enough to oil the bottom of the pan.) Turn until cooked on all sides and firm. Serve either hot or cold.
I served these with horseradish and Mayonnaise Jacques for those who don’t like spicy stuff. Also you can serve with lemon and put these on a plate of Romaine lettuce so they look pretty.
Artichokes in their herb, lemon and garlic Bain Marie getting ready to bathe and steam and emerge beautiful and ready to enjoy.
Most folks have never had an artichoke prepared properly, at least not if they are American. I only prepare artichokes one way, the way I learned from my father, May his memory be for Blessing. I do not pressure cook them or steam them, these methods to me are the opposite of what I want to do with this incredibly special food. If I want to make something taste good I can never hurry in the kitchen, see my commandment number two, from my Ten Commandments.
I first soak the artichokes in a bowl or bucket of water and rinse them after I have cut around them in a circle to take off the spiky tops. This way the folks eating them are not getting poked by them or eating random dirt hidden at the bottom where the flower is tight. Then I prepare the Bain Marie.
It’s always better to use fresh herbs if you can get them or have them handy. Favorites for me are rosemary sprigs, parsley and tarragon. You can use oregano, thyme or marjoram as well. The artichokes will be infused with the flavor of these herbs, so pick ones whose flavors you enjoy. I put about two inches of water in the bottom of the casserole/dutch oven dish I am going to use for the artichokes. I add white wine or good sherry, and once again, don’t use the cheap stuff, the better the wine or the sherry, the better the flavor. If you don’t have white wine or sherry on hand you can put a dash of Mirin or some white wine vinegar. I rinse a lemon well and cut it in half and squeeze the juice into the water, then I cut the lemon into wedges or slices and add that into the water as well, you may not want to use the whole lemon if you are only doing two artichokes, but if you are doing more than two, go ahead and throw all of that lemon, rind and all in. Then I slice up several fresh garlic cloves and throw those in. Finally, I add some olive oil and often I throw some mustard seeds into this as well along with some ground coriander, good salt and some ground pepper. I let this bath/bain marie get hot, which only takes a few minutes, because it is not a lot of liquid. I place the artichokes in the water and put the lid on, they should have their bottoms covered but not much higher than 1/4 to 1/3 of them should be fully in the water. It is important that you use a pot with a tight-fitting lid and that you choose one big enough so that all your artichokes fit with their bottoms fully in the bain marie.
Bain Marie, getting ready to make some artichokes delicious!
I let the water come to a boil, this steams them and also infuses them with the ingredients in the bain marie. I turn the heat down just enough to keep them steaming, but not too hot so that all the water dissolves too quickly. You can’t have it too low either or they won’t cook. It’s a delicate balance. If you do the heat correctly, you will have a nice amount of herbed water left over to make a sauce with or to use as a stock for a yummy soup.
Doing artichokes this way takes anywhere from forty minutes to an hour, depending on the artichoke. You don’t want them so over done that the bottoms are mush. You have to tend to them and check on them and be careful when you take off the lid, steam burns are no fun. Also, if the water is evaporating too fast and your artichokes are still not done, add more wine and water before it’s all gone. Test the artichokes to see if they are done by grabbing a leaf directly from them in the pot, if the bottom part you are eating comes off pretty easily and isn’t mush, they are done. If the leaf doesn’t come off easily from the whole flower or you can’t get the bottom part off easily, they aren’t done.
Once they are done, if I am serving them immediately, I remove them from the pot and place them on a large plate all together or in individual bowls. I then pour some of the bain marie water with the herbs over them. You can eat them this way with no other flavors, but being French, that never works for me. I make a fresh mayonnaise to go with them or a lemon butter sauce or a vegan lemon, garlic and herb olive oil dip.
Mayonnaise Jacques
Mayonnaise Jacques,selons les directions de Papa (according to my father’s directions):
All ingredients need to be at room temperature for optimal blending. I use my vita-mix now, but you can use an electric hand-held mixer as well. Mayonnaise is tricky and won’t always come out properly, it’s something of an art. If it doesn’t plump up, it still tastes good and is more like a sauce than a thick yummy mayonnaise. Don’t give up trying to get it right. You will one day.
Two eggs
1/2 cup to a cup of good olive oil
a teaspoon of Dijon mustard
juice of one lemon
white wine vinegar
salt and pepper
freshly chopped tarragon or dill
dash of paprika
In a small bowl combine the Dijon, white wine vinegar, salt, pepper and the lemon juice, mix together well.
In the blender or bowl using the mixer, add the eggs and mix on high for at least a minute or more, then add the lemon/Dijon mixture and keep blending for another minute or two. This is the tricky part now. You will slowly, very slowly add the olive oil in tiny drips or a slow very thin steady flow. It can take at least five to ten minutes to do this depending on how much olive oil you are using. The mayonnaise should start to thicken and will be warm from the whipping it is getting. When you’ve added all the oil, remove it from the blender (if you are using a blender) and put it in a bowl, fold in the fresh herbs and the dash of paprika and put it in the fridge so it cools. You need to do this before you make the artichokes. You can use this on sandwiches, on fish, on vegetables or just eat it by the spoonful, because it’s that good.
Always remove the center of the garlic cloves when using garlic.
Vegan Sauce:
In a small saucepan combine juice of one lemon, freshly and finely chopped garlic (one to two cloves), and 1/4 cup or more olive oil. You can also add some fresh herbs to this and some salt or keep the salt out if you are doing less salt. The garlic and fresh herbs with the lemon give a great flavor. Heat this until it is warm and stir, but do not cook on high, you don’t want the garlic to get brown or the olive oil to smoke.
Enjoy these lovelies, they can really be your meal when made correctly. You will need a large bowl for discarding the petals once you’ve eaten the bottom parts. To eat the heart, you have to remove the protective urchin like threads that are inside the heart. This is easy when the artichokes are done right and not too hot, just run your thumb between the heart of the artichoke and the stuff you want to remove. You cannot eat these threads, they are pokey as well and don’t taste good.
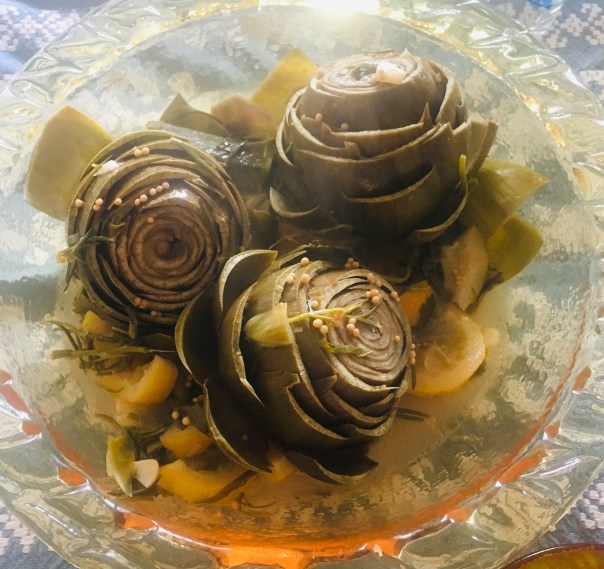
Here are the artichokes or artichauts (once cooked with the bain Marie poured over them) in their golden bowl waiting to make someone’s tummy happy. I cooked these in my father’s honor tonight as I remember him on what would have been his 96th birthday. I am so grateful for all the wonderful meals we shared together and the way he taught me to make food taste like something out of a fairy tale!
When I roast a chicken, I always keep the bones and carcass and whatever parts don’t get eaten up in the first day or so. If I don’t have time to make the soup then, I throw the chicken parts and the vegetables I roasted it with in the freezer until I have time. The trick here is to not be in a hurry. If you regularly roast a chicken you will regularly have chicken bones and can make stock. You don’t have to do it the same day or the next day.
Ingredients:Leftover chicken, yams, potatoes, carrots, celery, lemon juice, fresh herbs, salt and pepper to taste, curry powder and cayenne (optional).
Take the bones, and remove as much of the cooked chicken as you can and set aside in a bowl in your fridge. Then using good water, so if you have a filter, use that water, fill your soup pot 3/4 up with water. Put the whole chicken carcass and various bones into the water. It’s okay for their to be some skin and bits of chicken. Let all of this boil for at least an hour, you can turn the heat down once it starts boiling, but you want it hot and cooking for a long time. I usually do two hours.
Then, I strain the liquid and let the chicken carcass and bones cool down. I put the liquid stock back on the stove. At this point I add whatever left over vegetables I have that I roasted with the chicken if there are any. I add a yam or two, a whole onion, carrots, celery, fennel, basically whatever vegetables I have on hand. I let all of this cook for another hour. I put a liberal amount of curry powder in and salt the soup as well. I often add a little cayenne or other spicy peppers depending on who will be eating the soup. I like a little kick, but this is optional. Once all the veggies have gotten soft. I blend this soup with the leftover chicken pieces from before and whatever remaining chicken I claim from the now cooled down bones. Once all of this is blended, it goes back on the stove and I add the juice of at least one lemon if not two, freshly cut herbs if I have them. The best herb for this soup is tarragon and you can use dried tarragon. I add chopped parsley and basil as well. These are the three main herbs I use for this soup. Basil helps with colds and flu, tarragon gives this soup a sweet tang and parsley is everywhere in my cooking.
Vegan Variation:
Ingredients: Roasted Root Veggie stock (see recipe link below), yams, potatoes, carrots, celery, lemon juice, fresh herbs, salt and pepper to taste, curry powder and cayenne (optional).
This soup is delicious without the chicken stock or chicken, but you need to make a roasted root vegetable stock to get the warm flavor, see the Brazilian Sweet Potato Tomato and Carmelized Onion soup recipe for directions on that. Once your stock is strained and ready, just add the vegetables as mentioned above and follow all the same directions. You just won’t be adding any chicken parts. You can also cook some of the veggies in olive oil before adding the strained roasted root veggie stock to give the soup more oomph!
Serve this soup with crackers or bread or just by itself. I always make a big batch and put several small containers in the freezer. Speaking of storing food, it’s important that you know how to do that properly. You should never put hot soup in the fridge or freezer. I put the soup into 1/2 gallon glass mason jars when it is still hot or warm. I fill a big bowl or a plastic tub with cold water and some ice-packs and let the soup cool down in these containers before putting it in the fridge. I don’t freeze any of it until the following day when I take the cold soup from the fridge and then put it into plastic freezer safe containers. I always label with the month and year and list the ingredients as well so the soup can be given to my vegan friends or my chicken eating friends in need.
As with any of my recipes, if you have questions, email me or contact me through this blog. I’m more than happy to help you have a great soup!
A very small amount of the hand mushed and textured version of Baba Ganouj/Ganoush. The small cup is a favorite of mine, meant for green tea, but graced with a frog (my favorite creature) and sitting on one of my brother Paul Barchilon’s tiles.
1–5 eggplants (the big round/long ones, not small Japanese ones). The variation in amounts of eggplant is related to how much you want to have on hand for the volume of folks you are serving
tahini 1 tablespoon per eggplant
juice of ¾ to one whole lemon per eggplant
salt (a few shakes or pinches of good salt, not table salt) See my post Let’s Talk Salt.
drizzle of olive oil (approximately ¼ cup for 2 or more eggplants)
1–3 cloves of peeled garlic per eggplant. It is crucial to remove the centers of the garlic cloves for this dish, so your Baba is not bitter.
DISCLAIMER: The following recipe descriptor is considered inappropriate by some. It is R rated and for mature audiences.
This is the easiest eggplant dish there is, and in fact the key is to forget you are making it. Wash your eggplant and fork it, then place it on a baking pan in the broiler or oven. You can do this over a flame or in a cast iron pan on the stove, but I don’t recommend doing it that way. It takes a lot more effort on your part. You have to turn it every few minutes so all the sides get exposed and the eggplant cooks through and through. The oven method is less hard on your fingers, but the flavor will be less smokey. Preheat your oven to 400° or use the lower rack of your broiler. The broiler method is much faster cooking and you have to turn the eggplants at least once, so it’s not the walk away method.
The key here is that once you’ve placed that eggplant in the oven, with some oil spread on the baking sheet or on a piece of tinfoil, walk away, wash your hair, write a few letters, do something else! When you smell the eggplant and wonder what that aroma is, then it is done.
It will be collapsed and mushy. This can take anywhere from 20–40 minutes depending on your eggplant. Using a hot pad or glove remove your eggplant from the broiler or oven. Let it sit for about twenty minutes until you can handle picking it up by its stem. My hands are seasoned from years of cooking, so I do this fairly quickly. You can wait an hour if you want. In a bowl, start to peel your eggplant, with your fingers. It will start to fall apart, that’s fine. If it’s a very seedy eggplant, get rid of as many seeds as you can with your hands. You need to gentle the seeds away from the pulp. The seeds can make this dish bitter. It’s very hard to get all of them without also losing some of your eggplant, so a few seeds is okay, but you want to remove as much of them as you can.
Warm eggplants minus skin, waiting to be gently separated from their seeds.
This is the best part of the dish. Getting intimate with a warm wet eggplant is like interacting with a certain lovely part of the female anatomy. In fact making this dish can be a good prelude to sexual activity. When you’re done enjoying yourself put the eggplant pulp into the blender or if you want to continue your sensual experience, mash it with your fingers or use a fork. It will be wet and juicy.
I often do this step directly over the blender if the eggplants aren’t super seedy since I want the smoked eggplant oils as part of the flavor. Discard the stem, the peels and the extra seeds. Combine all the other ingredients into the blender or your bowl and mix. Add more salt if you need to or more lemon. Serve warm with a garnish of fresh chopped parsley. This can be eaten with crackers, bread, vegetables, or served over rice. It is best at room temperature or warm. It will keep in the fridge for a week or so. Some folks like their Baba more blended with a creamy texture, others like it more thick and wild. Use the blender for the smoother variety and the fork and finger mushing for the chunkier variety. No matter which way you like your eggplants, you will enjoy making this dish!
From my heart, hands and other parts of me, Lots of Love to you as you get into your Baba! See Commandment number 6!
1/2 cup to one cup of shredded, unsweetened, toasted or raw coconut
ten or more dates, pitted and chopped fine (you must use a cutting board and knife, do not destroy your blender or food-processor with this task, it is a messy, sticky job, but it’s a by hand job, not by machine job)
1/2 cup to one cup of almond meal/ground almonds
1/4 cup rose-water or orange flower water (your preference)
one to two tablespoons of pomegranate molasses, honey or maple syrup
cinnamon and nutmeg to taste
Put the almond meal and coconut in a large wooden or ceramic bowl (not metal) and add the chopped dates. Wash your hands, dry them and then mix with your hands until you get the dates and nut meats well mixed.
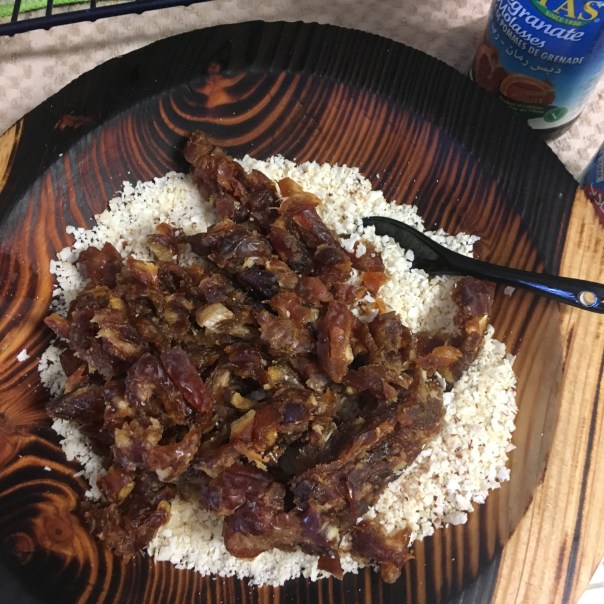
Shredded coconut, ground almonds and chopped Medjool dates
Add the rosewater and syrup and mix again, you will now get something more like a ball of clay. Once you have mixed this up and it is all adhering together, add the cinnamon and nutmeg.
Big lump of yummy stuff all adhering together well.
Once you’ve mixed in the spices, you can start taking small lumps from your big lump and rolling these together into small balls. Add a tart cherry to the top or a whole almond and you are done. These will keep for quite some time in the fridge. I prefer to eat them at room temperature, so take them out an hour before you serve. Some folks like them cold. Try them both ways and see what your preference is. These are gluten-free, vegan and sugar-free (mostly, the pomegranate syrup, honey or maple syrup are a kind of sugar, but they aren’t white sugar). These nut-balls are addictive and you will find you’ve eaten several before you know it!