¼ cup dried cherries (unsweetened, or apple juice sweetened)
½ cup dried apricots (unsweetened, or apple juice sweetened)
½ to ¾ cup dried unsweetened pitted prunes
½ cup raisins, golden and regular
6-8 pitted dates
¼ cup shelled pistachios
½ cup shelled walnuts
¼ cup shelled hazelnuts
¼ cup shelled almonds or pecans
¼ cup rosewater
1-2 teaspoons cinnamon
½ teaspoon nutmeg
1 cup dried shredded coconut, unsweetened
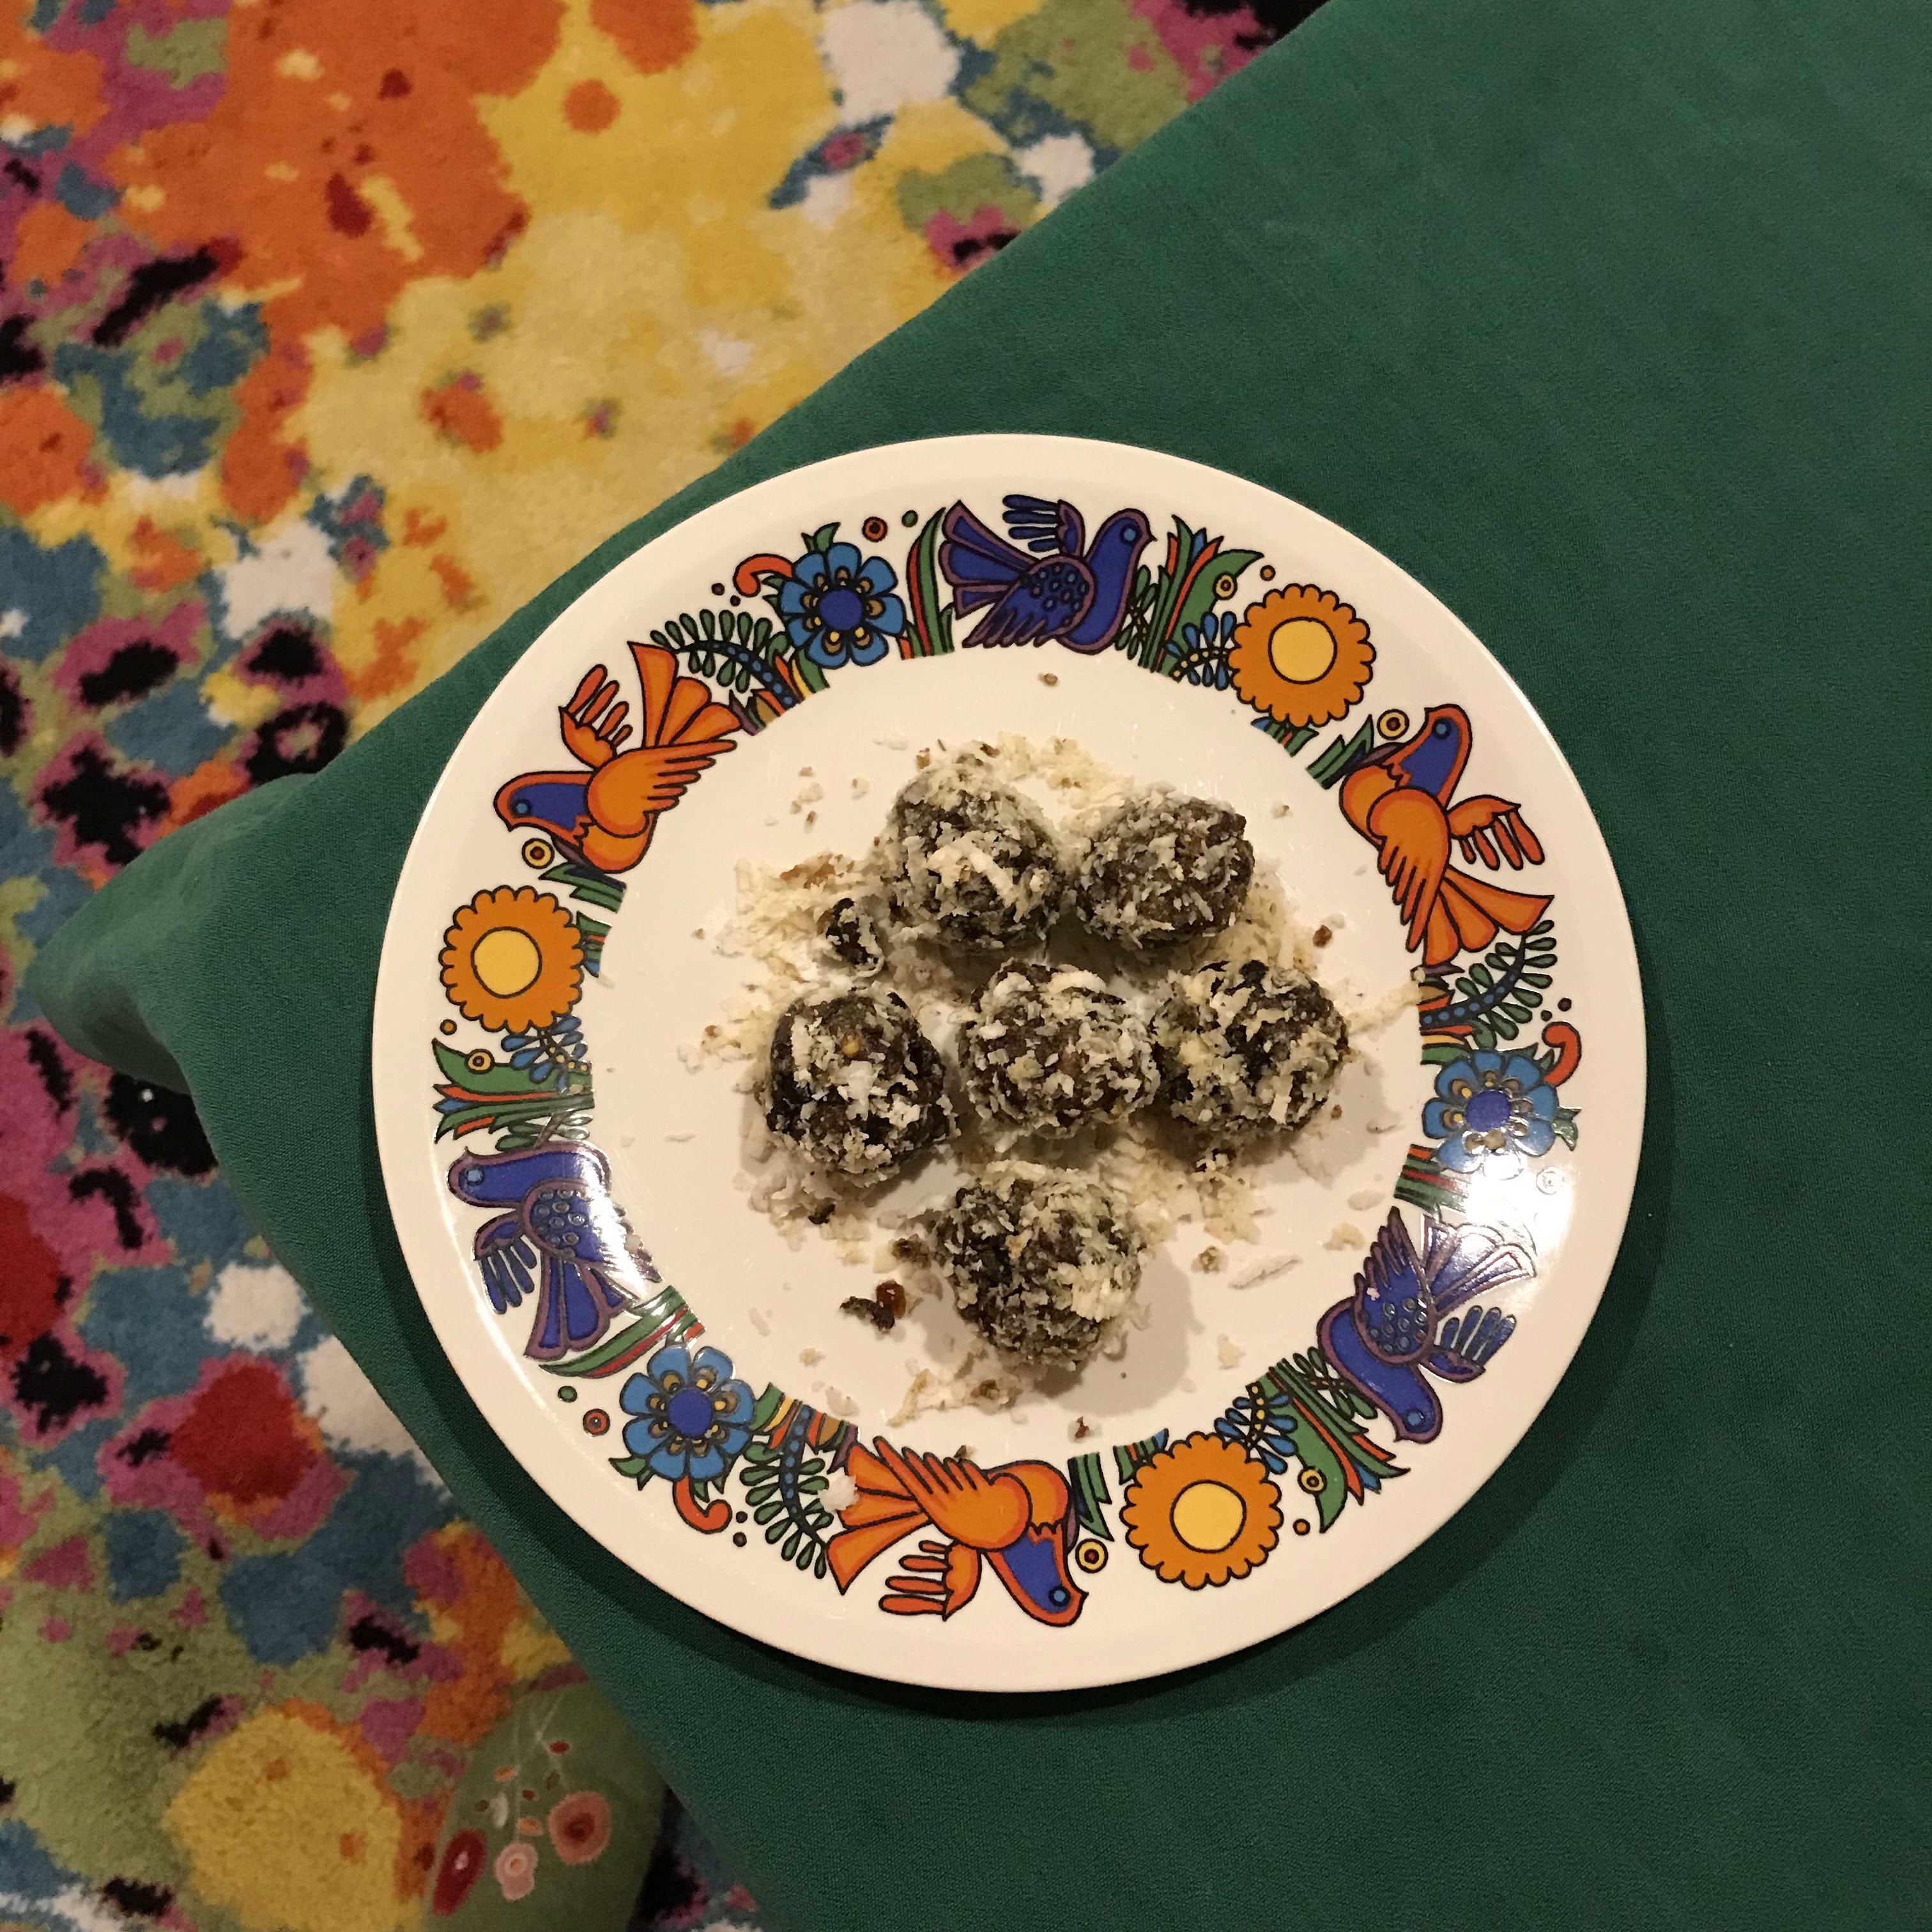
This recipe is hard on the hands and very sticky. The first step is to soak the raisins, or the cherries, or the dates, or the prunes, or the apricots in the rose water for at least fifteen minutes. It doesn’t matter which dried fruit you soak. I usually pick the fruit that seems the driest. Start chopping up all the dried fruit into very, very small pieces. Do not attempt this in a food processor, you will break your food processor, most likely. This is a job done best by hand with a good strong heavy knife. Chop, Chop, Chop! Put all the chopped fruit into a large wooden bowl or a glass one. Sprinkle the cinnamon and nutmeg and add the leftover rosewater from the soaked fruit.
In a food processor chop up all the nuts until they are pretty finely ground. I am allergic to almonds, so I don’t actually use almonds in mine. You can use pecans, or any combination of nuts that you like. The pistachios and hazelnuts are particularly yummy though in this recipe. Once the nuts are finely ground, put them in the bowl with the fruit and mix with your hands for the best result. You will have very sticky fingers.
On a large plate put the shredded coconut in a layer covering the plate. If you want to lightly toast the coconut prior to this step, that is also a good idea. Or, you can just use it as is. Have a clean plate handy. Make round balls about a teaspoon or so of mixture to make one ball. Roll in your hands until the mixture is round then put the ball on the coconut plate and roll around until it is all coated, then place the finished ball on your clean plate. Repeat until you’ve used up all the mixture. These will keep for a very long time in the fridge. If your mixture feels too dry, add some rosewater or a drop of balsamic vinegar. Keep these balls in the fridge in a covered container. They actually taste best at room temperature, so take them out before serving them.
Added benefits of these are they are a great dessert with no sugar, other than the natural sugars from the dried fruit and they help with constipation due to the high content of prunes.
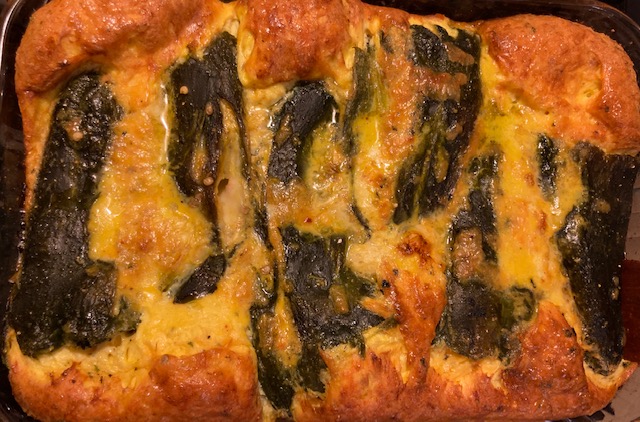
I am no longer eating gluten, but one of my favorite things is Chilis Rellenos. I found a recipe from the 1970s that was a for a casserole that didn’t involve the time consuming deep frying and the flour. Although their original recipe had flour in the egg mixture. I adapted their recipe to make these. I did use about 1/2 cup masa/corn flour, but you could eliminate that if you want. I find it gives the casserole just a tad of texture that I like.
The hardest part of all Relleno recipes is that you have to roast them to get their skins off. This is something you can do a day before, but it takes time and it stinks up your kitchen and messes up your stove top or broiler. If you don’t have a gas burning stove, I don’t know how to tell you to do these. I’ve never tried broiling or roasting them without an open flame. So, you can set the Poblano or Anaheim peppers, one or two at a time, over your gas flame and let them cook directly on the flame and get blackened and turn them frequently to get as much of the skin cooked/browned/black. Immediately after getting the pepper cooked put it in a glass bowl with a cover, you can use a plate if you don’t have a glass bowl cover. The point is to seal the heat in the glass which helps steam the pepper.
So, you repeat this process ten or more times for each pepper. It’s okay for the heat and steam to escape each time you add another pepper. Eventually all the peppers will be finished and you will keep the plate or lid on your bowl for a 1/2 hour or so. You can do this overnight as well. If you are using the broiler, less messy, not as flavorful, you have to pay attention and turn the peppers (and you can do them all at once) every few minutes. I have cooks’ fingers, which means I can turn these peppers with my bare hands, if you don’t have toughened fingers, wear a clean cloth mitt or use tongs to turn the peppers.
You cannot cook this recipe if you are in a hurry or distracted.
This is a labor of love.
Once you have steamed the rellenos, you will start to peel off their skins. This is a messy job. I recommend having a small bowl of warm water to rinse your hands off with. Put the whole peppers in the bottom of a large glass casserole dish that has been liberally dosed with olive oil. You can leave the stems on or cut them off as you wish. If you cut them off, your cheese will run out more into the casserole, leaving them on is a nice visual. For this batch I cut them off, but I’ve done it both ways.
Cut up as many long thin strips or wedges of either Monteray Jack cheese or Pepper Jack cheese or a vegan equivalent. Make a cut in the peppers vertically, they may have natural tears in them from the roasting, and insert the long wedges of cheese. It’s like a pepper burrito, you are stuffing the peppers with the cheese.
Separate the yolks from the whites of twelve eggs. Whisk the egg whites so they are fluffy. Mix the egg yolks with some milk, or half & half, just a 1/2 cup, and a 1/4 cup sour cream or crème fraiche. Add salt, pepper, cayenne and paprika as you like. You can omit the cayenne if you don’t want spicy. I always want spicy! Add 1/2 cup of corn meal/masa or whatever flour you want to use that works for your diet. I don’t recommend a nutty flour, you could use rice flour or cassava flour. Add the egg whites and fold so you have a light mixture. Add a cup of grated cheddar cheese.
Pour this whole mixture over your chilis and bake in the oven at 365 for 45 minutes to an hour. The egg mixture will puff up and become a beautiful golden brown.
This is the color that you want your casserole to be when it emerges from the oven
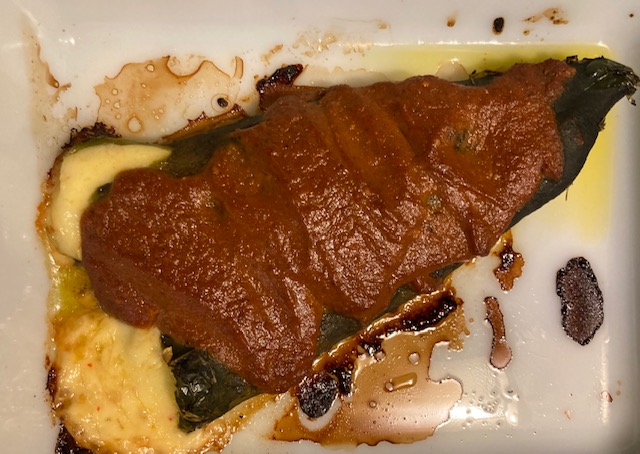
Eggless Version: Do everything the same for the chilis, but instead of mixing up the egg batter, make a fresh red salsa or use a good one from the store and coat the Rellenos with it. Bake in the oven for 1/2 hour. It won’t need as much time.
Relleno with homemade fire-roasted tomato, cumin, salsa
This casserole is best served with a warm fresh marinara sauce. I make mine from scratch and the recipe is from my daughter’s Israeli grand mother. I’ve never found a better one: Sapta Rachel’s Best Tomato Sauce. If you are using the fire-roasted tomatoes, instead of fresh tomatoes, which is what I do in the winter, I just adapt her recipe and use the defrosted tomatoes I’ve had waiting in my freezer for just this moment. I also omit the basil from this marinara as the flavors are more Mexican than Italian.
Fresh Fire-Roasted Salsa: Combine in a blender two or three Serrano or Jalapeño peppers with a quart of fire-roasted tomatoes (which have garlic, salt and pepper already in them if you are using ones you made from my recipe). If you are using canned ones, add four or five fresh garlic bulbs, salt and pepper. Add a tablespoon or more of oregano and a handful of fresh cilantro. Blend until smooth. Grind with a mortar and pestle or in a molcajete two tablespoons of fresh cumin seeds, heat up in a small skillet or cast iron pot the ground cumin seeds and let them toast gently, stirring constantly. After about one minute, add the liquid and cook for 1/2 hour or so, stirring frequently and don’t let it boil, but get it hot and keep stirring. Add more salt or black pepper to taste and serve it warm on the table. Or pour it over your eggless rellenos and bake.
Molcajete de Lava Niegra
I also make pico de gallo, click on the words to get taken to that recipe, for a compliment as an added bit of crunch. Then you can make guacamole while the casserole is cooking. Serve with a fresh salad, corn chips, sour-cream and black beans (also made best from scratch).
Pico de gallo, Fire Roasted Cumin Warm Salsa, Marinara sauce, fresh black beans, guacamole, fresh salad and my husband Kevin’s birthday treat of fresh berries, flan and whipped cream for dessert.
I know this seems like a lot of work, it is, but it is way less work than making the actual Chili Rellenos the regular way, trust me on this!
Here’s the list of ingredients and amounts:
Ten to twelve Poblano or Anaheim peppers (don’t bother making this in a small size, you can always freeze portions of this and have a treat at a later date)
a dozen eggs (or vegan alternative)
two large blocks of cheese or vegan alternative (one Pepper Jack or Monterey and one Cheddar)
Fire-Roasted Tomatoes a large amount
olive oil
garlic bulbs -6-10 for salsas
fresh cumin seeds 2 tablespoons
1/2 cup corn masa/corn flour/ or flour of your choice
1/4 sour cream or vegan alternative
1/2 cup milk or cream
cayenne powder, paprika, salt and pepper to taste
Pico de gallo ingredients are in the recipe you can link to
Summer Bean Salad with Neukom Family Farms Heirloom tomatoes
I learned this easy simple recipe from my beloved Mother in Love Maren Frank. She and I don’t like the terms “mother-in-law, daughter-in-law.” They often have negative connotations and the relationship the two of us have is one of loving kindness, shared values and supporting each other in our differences. Much like a good bean salad, the different ingredients make a great combination of flavors. I’m a spicy pepper and she’s a good tomato, or perhaps she’s a nice sharp white onion and I’m the ripe tomato. I’ll let you decide!
Ingredients: Combine all of the ingredients below in a nice glass bowl and mix gently with a spoon and then refrigerate until you are ready to eat. This dish is better served at room temperature, in my opinion, so you can always take it out 1/2 hour before your meal or make it before you are about to eat.
One large 16 oz can of good organic garbanzo beans, my brand preference is Westbrae. If you have time and want to make garbanzo beans from scratch, that’s always better, but this salad is good with canned beans and much quicker to make this way
Three to four good tomatoes, this time of year, I’m getting mine from Neukom Family Farms and they are incredible. Slice up the tomatoes into small squarish pieces
One white onion, chopped very fine
Three to five garlic cloves, pressed or chopped very fine. Remember to always take out the center part of each clove
Sliced black olives, 1/2 a can or more depending on how much you are making
Fresh oregano and flat leaf parsley (you can use dried oregano if you don’t have fresh, but don’t use dried parsley). Chop up finely
Salt and Pepper to taste. Maren prefers white pepper, so when she is here I use white pepper, but when she isn’t visiting I use black pepper. This salad will taste different depending on which pepper you use.
1/4 cup good organic red wine vinegar or white wine vinegar or sherry vinegar or some combination of these.
1/2 cup or less of good organic virgin olive oil, don’t use cheap stuff for this, the salad needs a really good olive oil.
1/4 cup or so of pickled sliced banana peppers (these are not spicy, similar to pepperoncinis, but less piquant). My husband doesn’t like this ingredient so sometimes I leave it out, but otherwise, I think it is essential and love the little tang it gives this summer salad.
You can eat this plain or throw it over a green salad. It’s a great dish to bring to a potluck, although nobody is having those right now with Covid-19. This recipe is probably the quickest recipe in my repertoire. It takes fifteen minutes to make and if you let it sit for a half hour before serving the flavors are perfectly blended, but you can eat it right away too. It’s wonderful and keeps for two or three days in the fridge.
Thank you Maren! Enjoy!
May 14, 1989 Family Wedding of Nicole and Kevin. Maren (my brand new Mother-in-Love) is in the blue dress next to me. Maren is next to her son Andrew with my brand new husband Kevin. I’m in the front row center holding Issac, my mother Helen Redman, my brother Paul Barchilon, and my Aunt Ellen Weissberg Whyte, in black. Behind me, in glasses, are my Uncle Roger Weissberg and my Beau-Pere Kenny Weissberg (I don’t like the word step-father either). The French Beau Pere is softer and literally translates to handsome father. Not pictured, but still present at this wedding, were Kathryn Taylor, my daughter and my father Jacques. He was probably reading her a fairy tale so this picture could get taken.
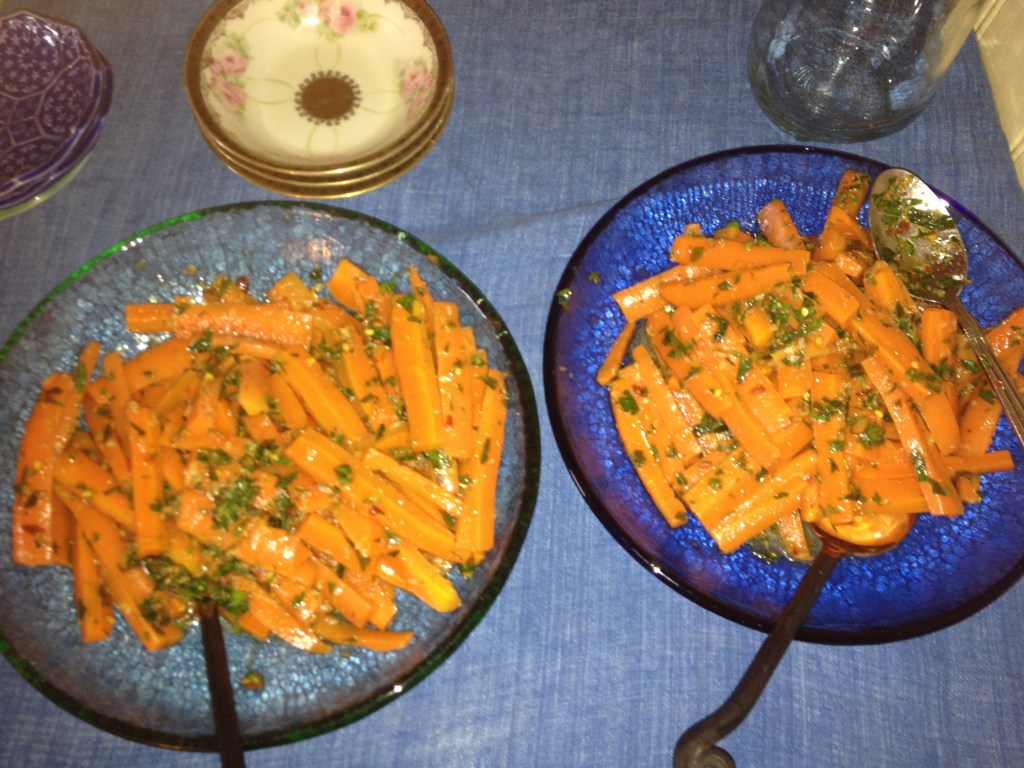
Moroccan Carrots nicely plated and ready to serve in local Fire and Light recycled glass bowls. This picture is from Pesach. These carrots are a perfect addition to any meal, holiday or just regular, but they add a definite flair to your fare!
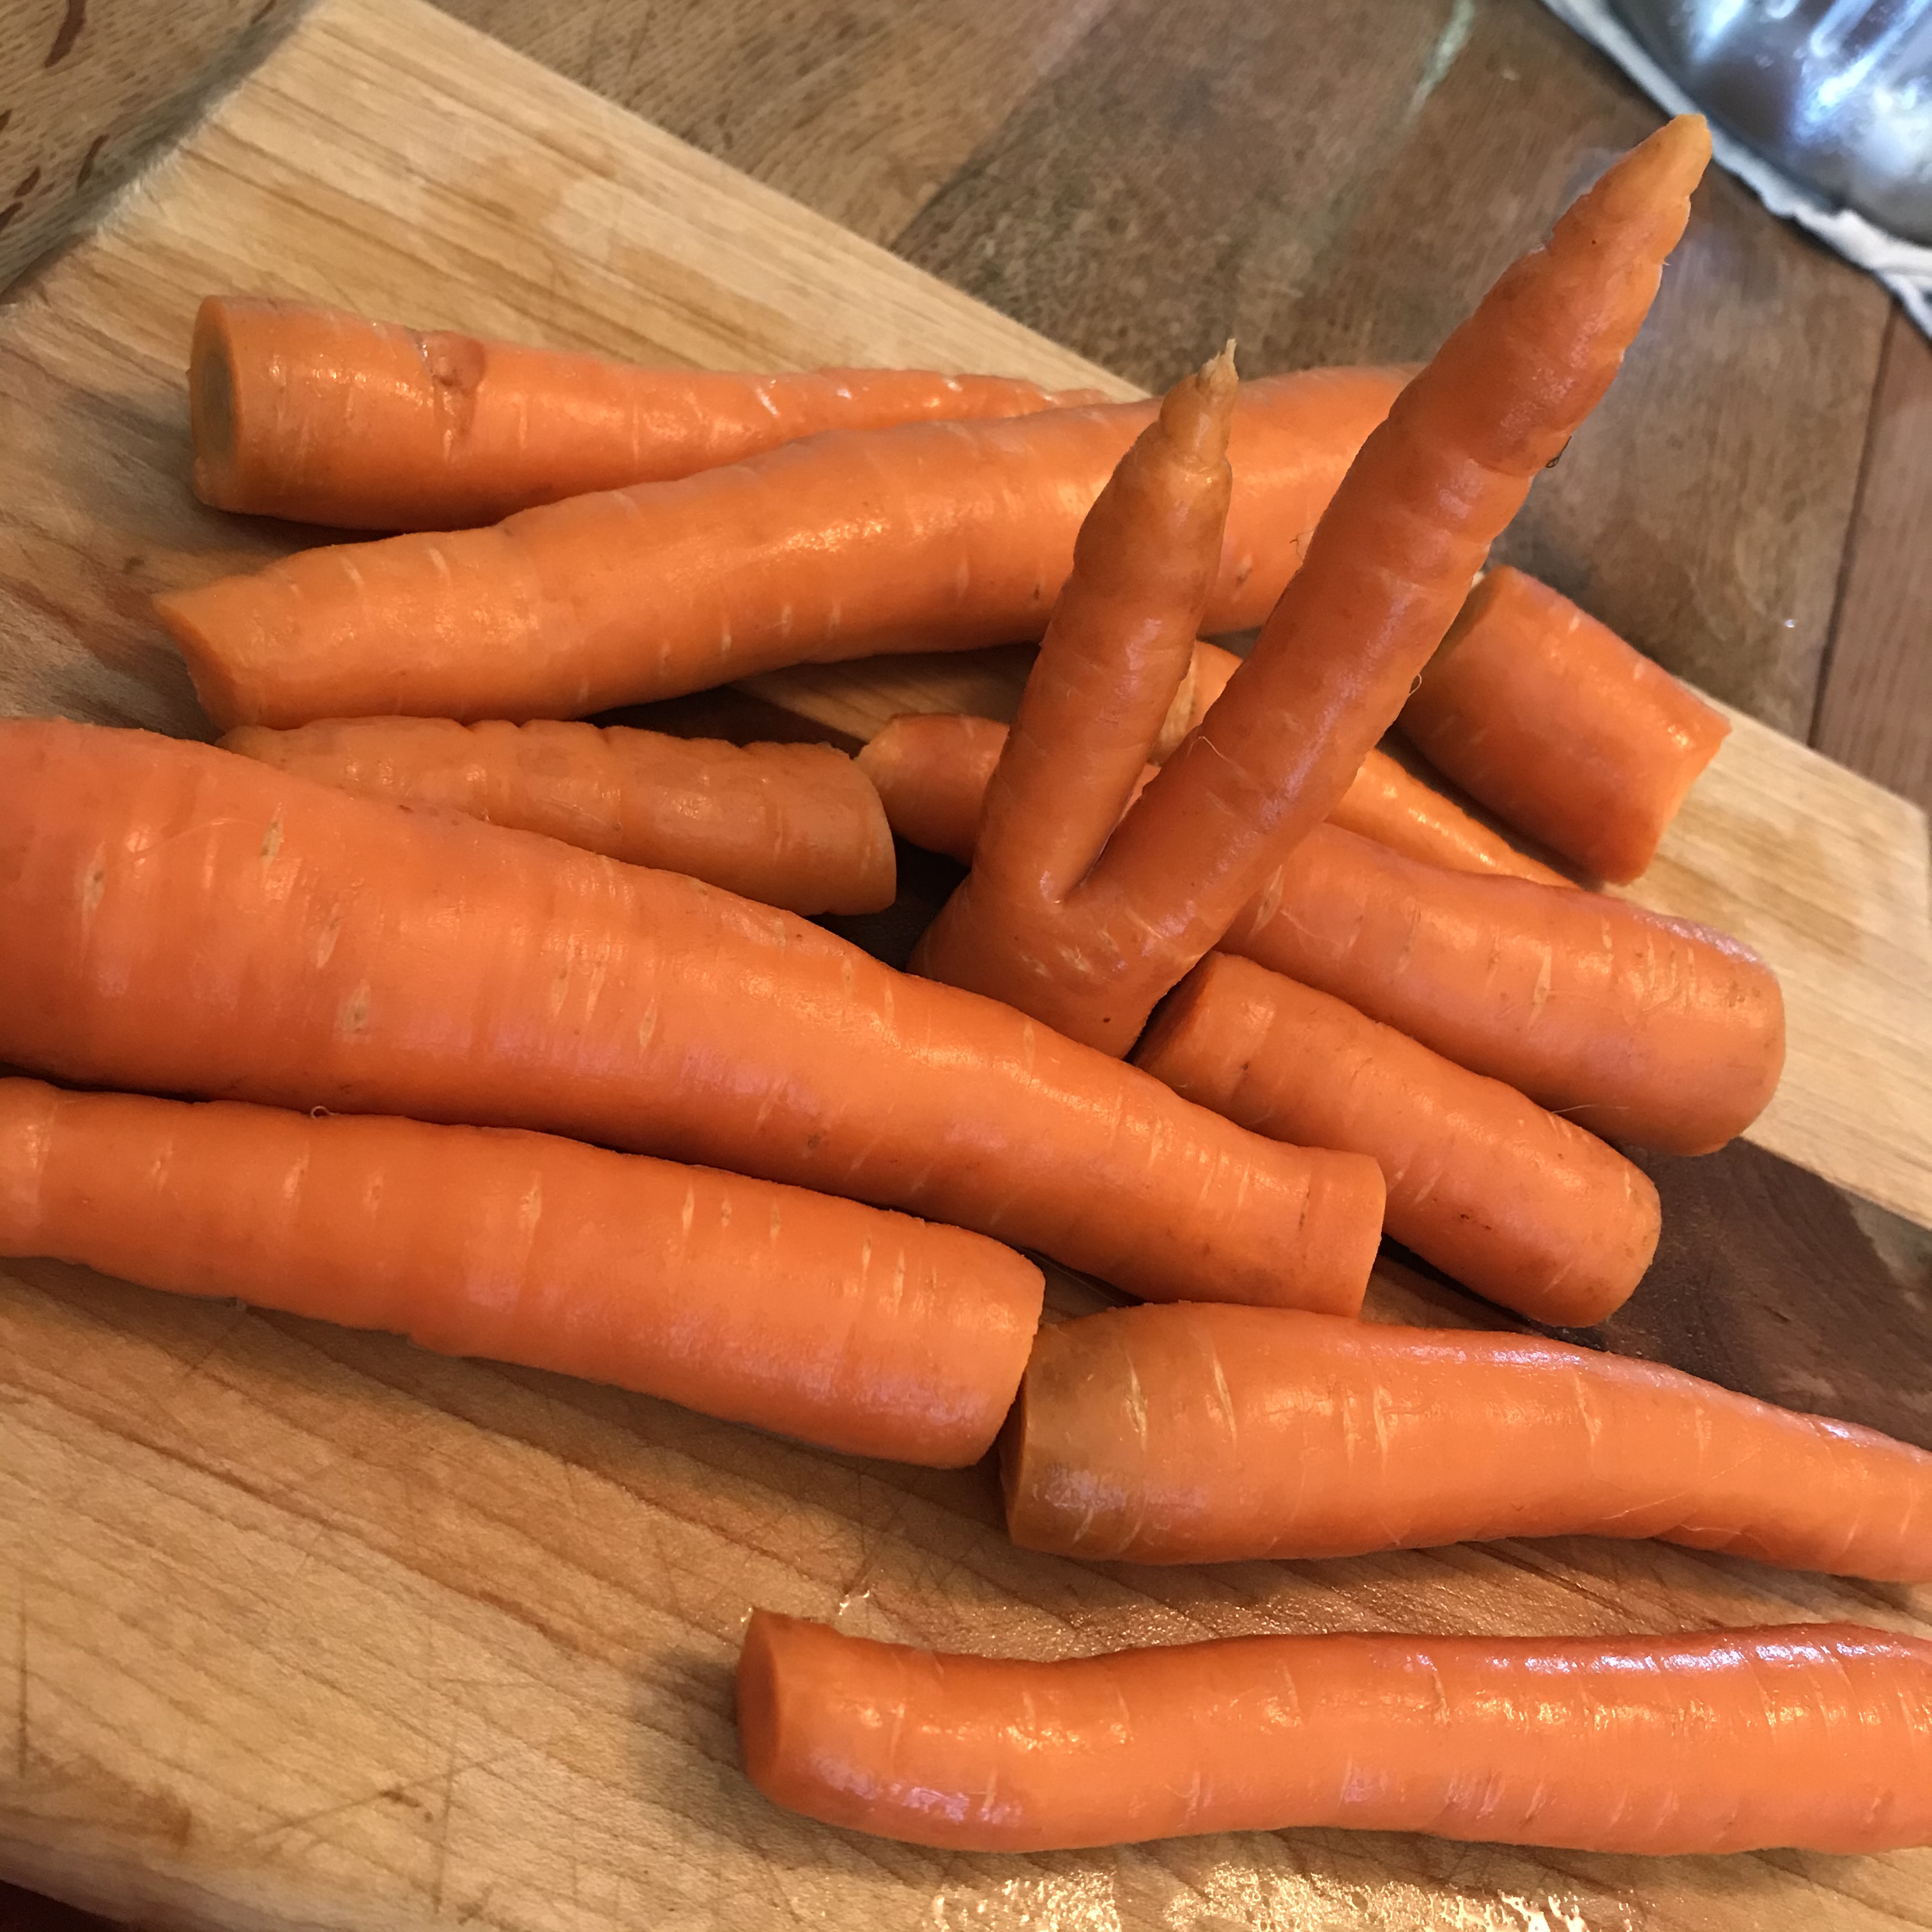
A large bunch of really excellent carrots, not pre-peeled “bunny love” in a bag. Good, large or fresh carrots, only!
five to ten cloves of peeled garlic with the centers taken out as per my previous instructions about proper garlic preparation.Properly Prepared Garlic
juice of one to two fresh lemons
1/4 or more of olive oil, depending on how many carrots you are making
fresh chopped parsley
1-3 teaspoons fresh cumin seeds ground in a mortar and pestle, do not use this much if you are using already ground cumin, perhaps 1/2 the fresh amount, but I warn you, it will not be as tasty with the already ground cumin
1-2 teaspoons good salt, See previous posting about salt:
1-3 teaspoons red pepper flakes
1 teaspoon or more of hot cayenne powder
(These carrots will be yummy without the spice for folks with a milder palette, but the spiciness is truly part of their charm. You can try substituting a milder cayenne or paprika.)
You need to clean your carrots well, if you aren’t peeling them. Have a large saucepan/soup pot of boiling water on the stove and put in some salt. You need to chop the carrots into long slivers for this dish, so it take a little bit of time to do so. More carrots is better. You will love this dish two days out and it’s unlikely it will make it that long as most folks just can’t stop eating these. Once you’ve got the carrots ready add them to the boiling water and blanch them for five to 8 minutes, depending on the thickness of the carrot slabs you cut. You need to have a bowl or large pan with ice water or cold water handy and you will remove the hot carrots immediately into the cold water with tongs or a strainer or whatever implement you have handy. Keep the boiling water handy and once it’s cooled you can use it for making rice or soup stock. It’s full of yummy carrot goodness.
Put the carrots aside and start working on the fresh cumin grinding. Once you’ve ground the cumin well, not to a powder, but you’ve broken down the seeds a fair amount, add your salt, and the garlic cloves directly into the Suribachi (bowl of your mortar and pestle) and mush, mash, pound that garlic into the salt and cumin seeds, it will start to break down fairly quickly because of the salt.
Suribachi with smashed garlic, red peppers, salt and ground fresh cumin seeds,
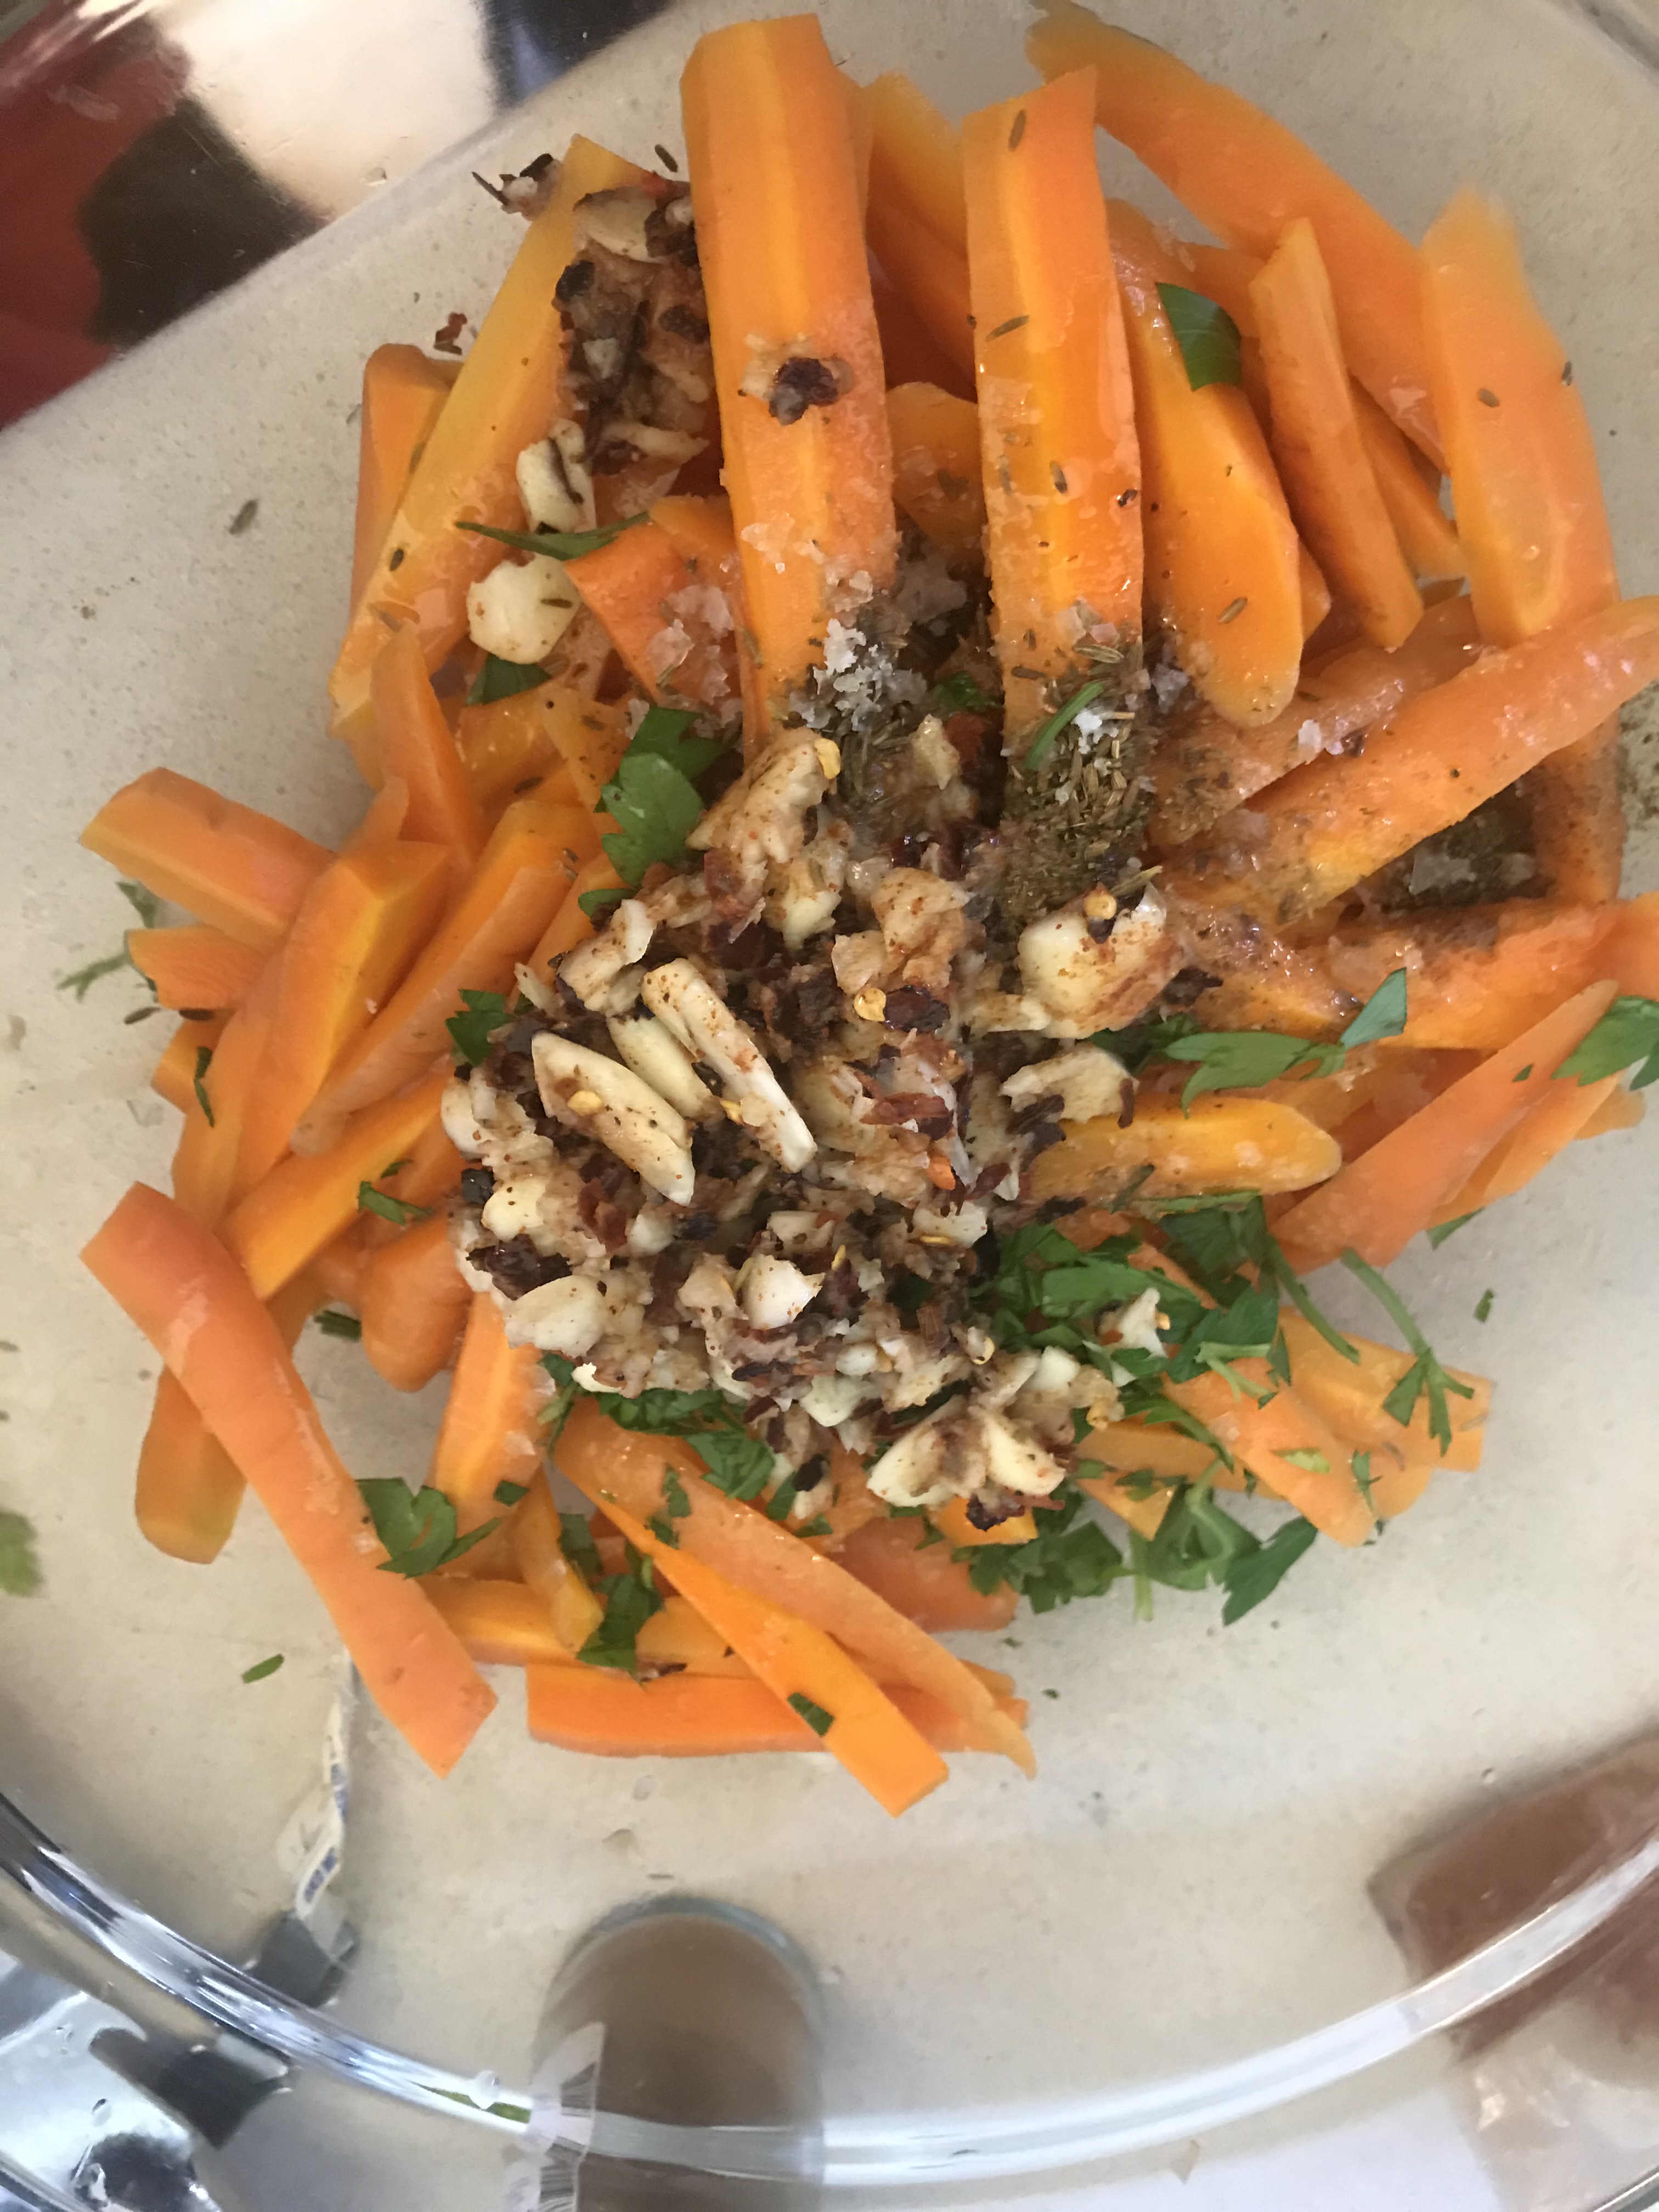
Once you’ve got it pretty mushed so folks aren’t eating giant cloves of garlic, add the cayenne, red pepper flakes, lemon and olive oil and mix it all up and then pour onto your carrots. Stir all of that up and add the chopped parsley.
Carrots with all the ingredients getting ready to be tossed together, your’e almost done!
These carrots are best served at room temperature, but you can refrigerate them for days. Just take them out an hour or so before your meal.
Enjoy and Lots of Love to you in your food making and food sharing!
Matzah Ball Mix (I use a package, and don’t make my own mix, the package version just makes better Matzah Balls than I find I can with my own mixing of plain matzah meal and other ingredients.
two to four eggs
In a large stockpot/soup pot heat the olive oil. Add the chopped onion and/or leaks and sauté for at least ten minutes, then you can add the chopped garlic and some freshly chopped turmeric and let that cook together for another five minutes or so, then you can add the carrots, turnips, celery and fennel. Sauté all of these veggies together for ten to fifteen minutes and add a bunch of the freshly chopped herbs. Then add whatever stock you are using, chicken or veggie.
Stocks:
This recipe requires using a good stock. If you are vegetarian or vegan, use my Roasted Root Vegetable stock, or your own version of a robust vegetable stock. If you have cooked a chicken, you always want to save the bones. If you don’t have time to deal with making stock, throw them in the freezer until you do. To make a simple easy and healthy chicken stock, put the chicken carcass and bones and whatever is left over from your cooked chicken into a large pot of water; you will be boiling this for at least an hour or two, so fill the pot to accommodate the fact that the amount will reduce. Then strain the liquid into another pot, and let cool down and refrigerate or freeze the liquid. Once the chicken bones have cooled down you can pick off all the remaining chicken and freeze this too or use in a chicken salad or add to another soup.
Matzah Balls:
I use the mix, as I said earlier, but I amend it, of course. I learned this trick from my brother Paul. Add turmeric, either fresh or ground, freshly and very finely chopped dill, parsley, tarragon, oregano, etc. The turmeric makes these matzah balls a gorgeous color, plus adds yummy flavor. You have to make the matzah ball mixture ahead of time as it needs to rest in the fridge for at least fifteen minutes or more. I also add a few teaspoons of the stock I’ve made in the mix, even though the instructions on the box don’t necessarily call for that.
Matzah Ball mix with added herbs, a drop of Maldon smoked salt, turmeric, eggs etc. This mixture gets covered and refrigerated for at least 20 minutes before you can use it to make matzah balls.
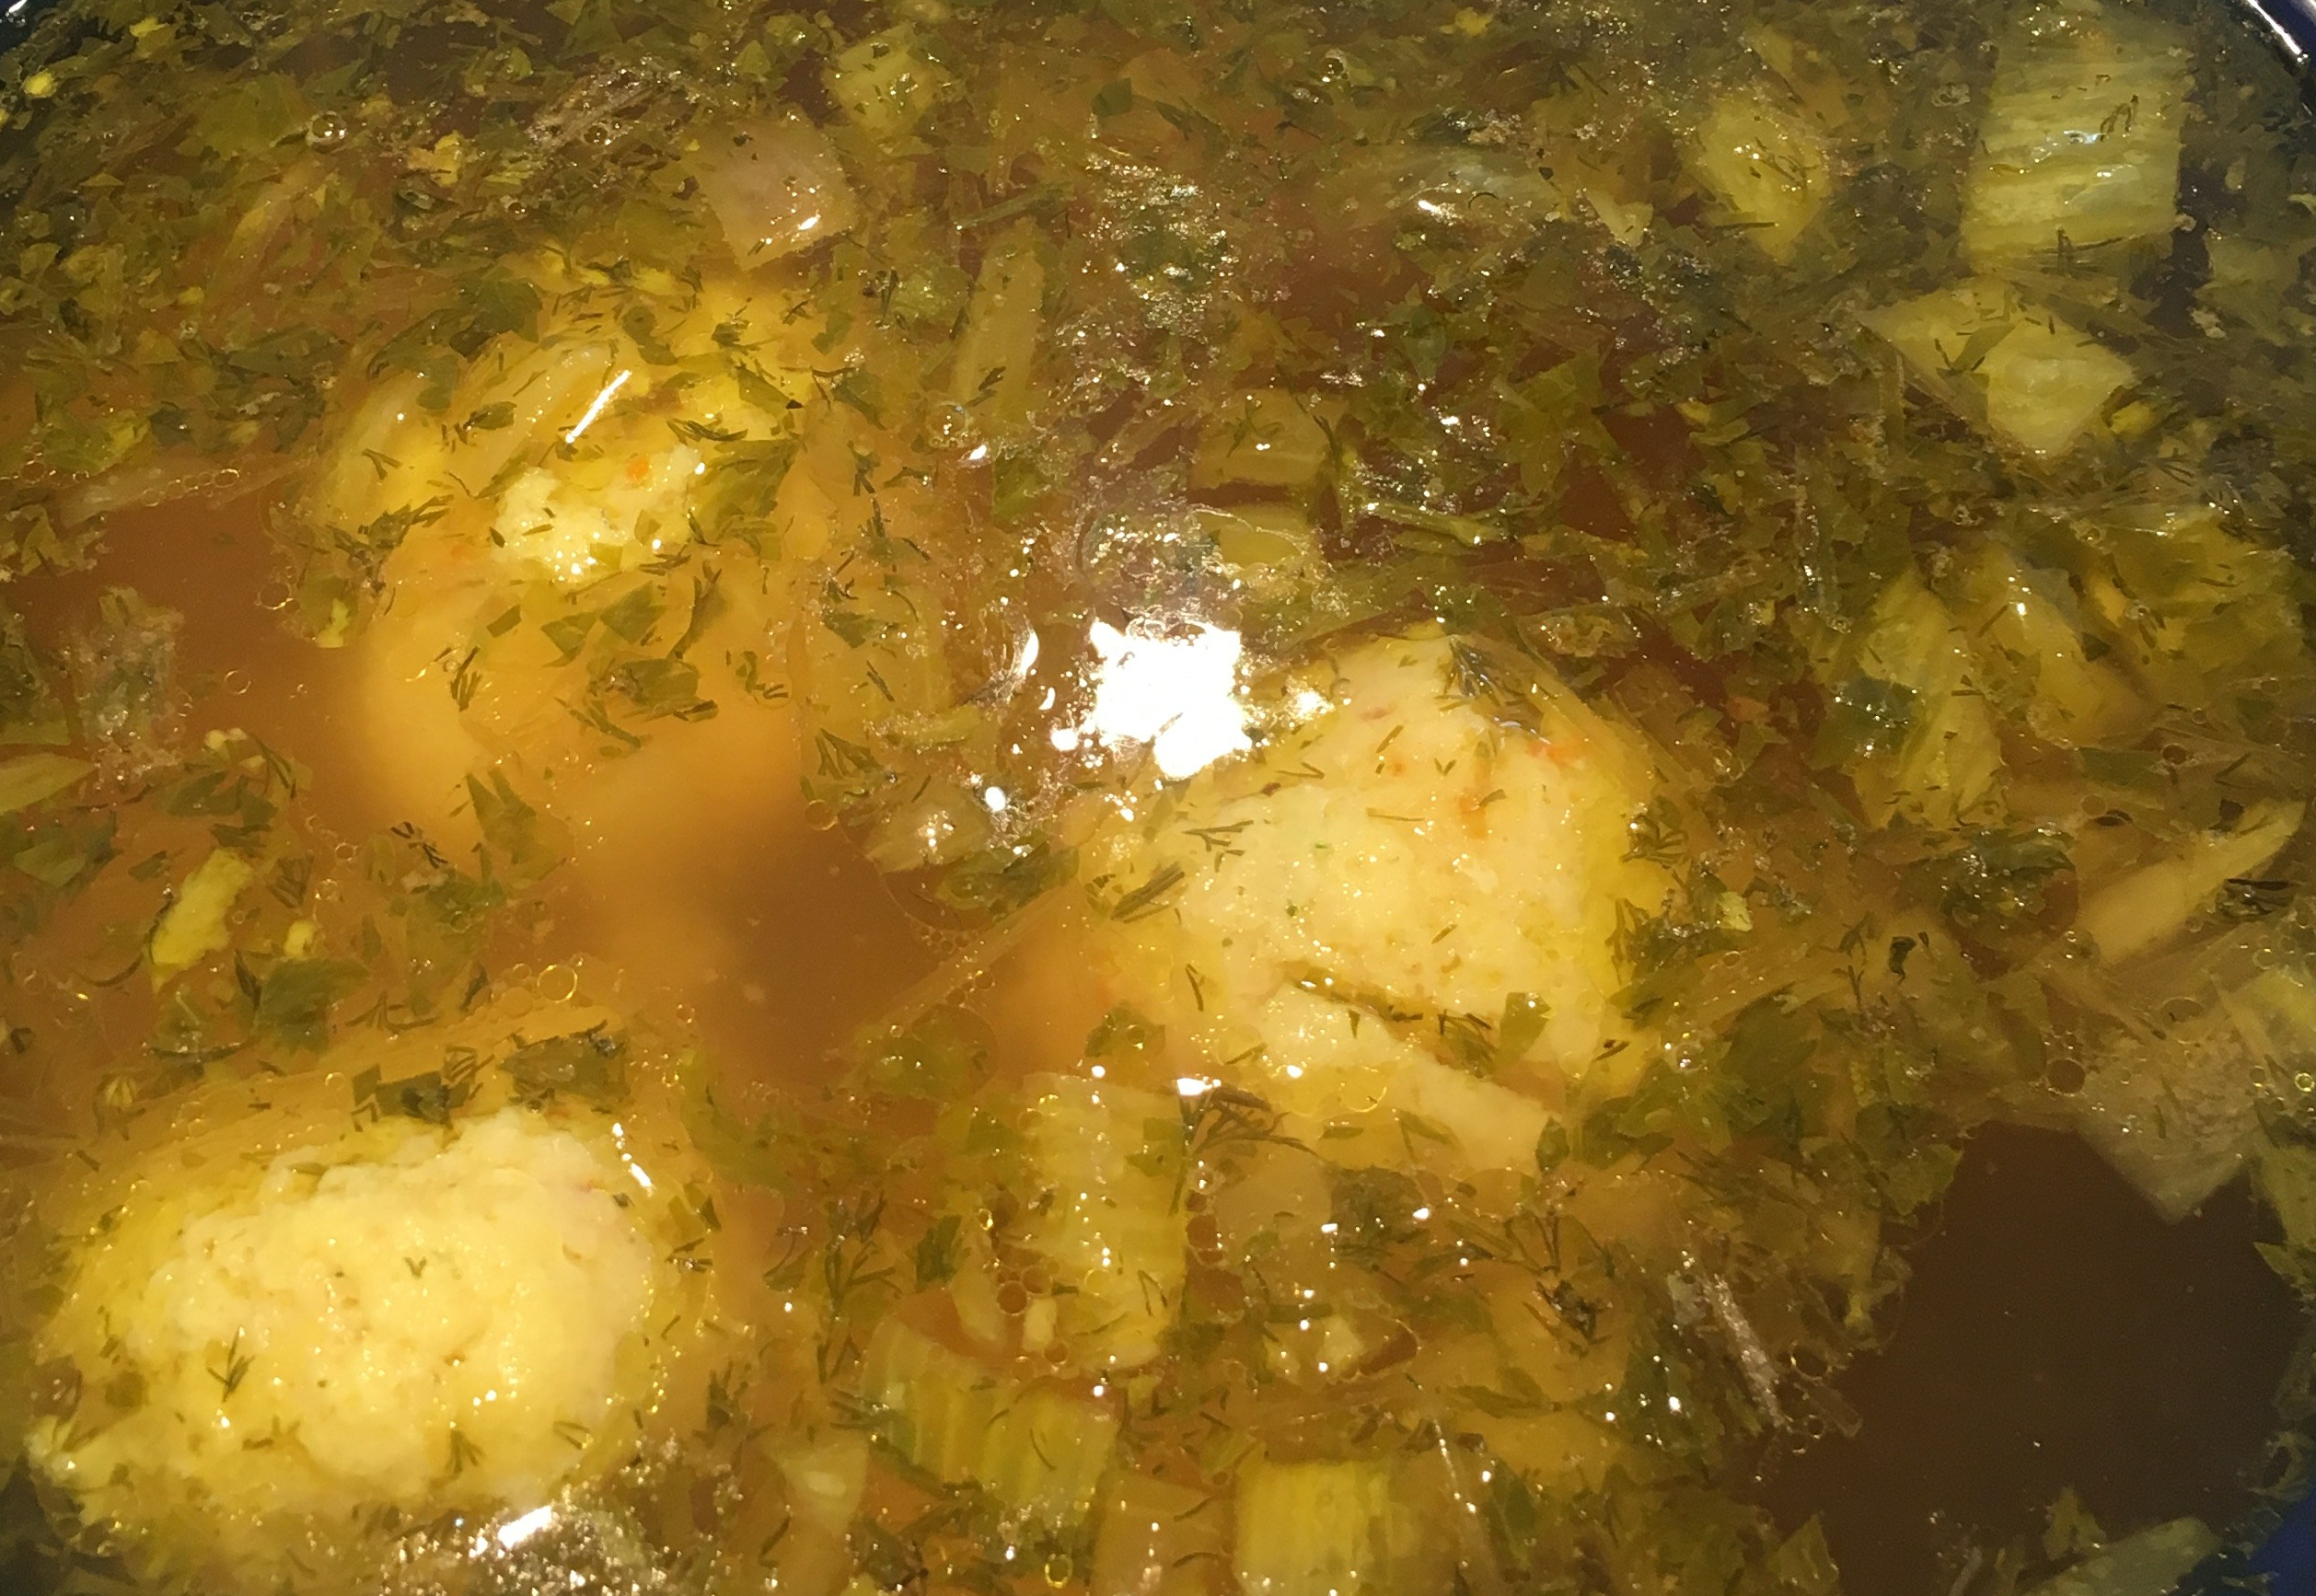
You also need to have a separate large pot of boiling water handy. Once your matzah ball mixture has cooled down, you will be forming the balls and dropping them into the very hot, rapidly boiling water and covering them. They need to cook in this water for at least twenty minutes or so. I then transfer them to the soup so they gather the flavors. I only do this the day I’m serving it. If you leave the Matzah Balls in the soup, they absorb the liquid and you don’t have so much soup left. If done correctly, the balls will float and be light and delicious. I hope they turn out this way for you.
Matzah Balls floating to the top of the hot water that has been boiling and covered for 20 minutes.
I do not know how to make a vegan matzah ball, you can try using an egg replacer of some kind or as my friend Bel-Ami Margoles suggests, just make the Vegan version of this soup and have the Vegans throw in some pieces of matzah to their soup. You can get gluten-free matzah as well, so if you are gluten intolerant and vegan or any combination of these you can try that. The soup itself is delicious, whether it has a Matzah Ball in it or not.
My parents’ table in San Diego, ready for soup to be served once folks sit down.